Setting up self hosted Linux Agent with Azure DevOps

If your CI/CD pipelines are in Azure, Microsoft provide you more convenient option to use Microsoft hosted VM with Agent to run your pipelines. When ever you requested to run your jobs, you get new fresh VM with agent. When it finishes execution of your job, it is discarded. Microsoft offers you 1800 minutes of execution of CI/CD pipelines monthly free of charge.
But when the team and the project is growing, more and more code are pushed to repositories. At the same time automated builds and releases are triggered. At this stage this free allocation is not enough for execution of your pipelines. Then next option is to go for self hosted agent, as MS offers you 1 Self hosted CI/CD agent with unlimited minutes.

Since most cost effective solution is to setting up your own CI/CD agent on Linux box, I decided to write this post on Linux first. Before setting up your build agent on Linux box, you must think of dependencies that should be installed to build your solution. I will be explaining steps required for setting up CI/CD agent for building .NET core and Angular application. Please note that if any of your project in your solution, uses .NET framework, then you cannot go with Linux VM and you must go for Windows VM. Steps required for setting up build agent are as bellows.
Setting up dependencies
Angular
You may want to setup same nodejs and npm as per your development. Using NVM package is best the way to do and you can install it by running below command on your terminal.
curl -o- https://raw.githubusercontent.com/nvm-sh/nvm/v0.3You should exit the terminal and open it again to apply changes. Then you can install NodeJs, NPM, Zip packages using below commands. Zip package is needed as we are going to zip build artifacts.
nvm install 12.18.4
sudo apt install zip
.Net Core SDK
This MS article https://docs.microsoft.com/en-us/dotnet/core/install/linux-ubuntu#2104 shows you the commands that you need to run, depending on Linux version that you used. I used below commands for installing .NET SDK as I went for latest version(21.04) of Ubuntu. I think better if we install .NET SDK as it installs all the dependencies required for building .NET core solution. I was able to build the .NET core 2.2 project also when I installed SDK 5.0. To do that first you need to add the Microsoft package signing key to your list of trusted keys and then install SDK.
wget https://packages.microsoft.com/config/ubuntu/21.04/packages-microsoft-prod.deb -O packages-microsoft-prod.deb
sudo dpkg -i packages-microsoft-prod.deb
rm packages-microsoft-prod.deb
sudo apt-get update
sudo apt-get install -y apt-transport-https
sudo apt-get update
sudo apt-get install -y dotnet-sdk-5.0
Install Nuget client tools
This article https://docs.microsoft.com/en-us/nuget/install-nuget-client-tools shows you how to install nuget client tools depending on type of your OS
#Install Mono
sudo apt-get update
sudo apt-get install mono-xbuild

# Download the latest stable `nuget.exe` to `/usr/local/bin`
sudo curl -o /usr/local/bin/nuget.exe https://dist.nuget.org/win-x86-commandline/latest/nuget.exe

# Create as alias for nuget.
alias nuget="mono /usr/local/bin/nuget.exe"

#You can add this alias at the end of the file of to your bash profile by running below command
sudo vim ~/.bashrc
Now you have all the dependencies that you required for building Angular and .NET core application. Now we shall move into setting up your build agent and agent pool.
Setting up Agent Pool and Build Agent
This MS article https://docs.microsoft.com/en-us/azure/devops/pipelines/agents/v2-linux?view=azure-devops explains you in detail how to setup your Linux build agent. When creating access token you must make sure to select scopes Agent Pools (read, manage), Deployment group (read, manage) and Code (Read). You can download latest version of build agent when setting up agent pool here.
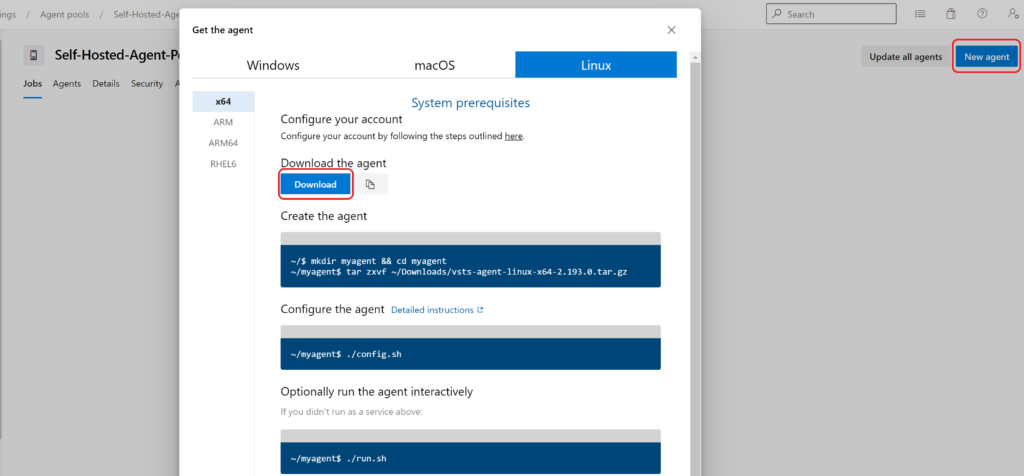
Commands that I excecated in terminal as below depending on latest agent version that was available, when I was writing this article.
mkdir devops-agent && cd devops-agent;
curl -o vsts-agent-linux-x64-2.192.0.tar.gz https://vstsagentpackage.azureedge.net/agent/2.192.0/vsts-agent-linux-x64-2.192.0.tar.gz;
tar zxvf vsts-agent-linux-x64-2.192.0.tar.gz;
sudo ./config.sh;
sudo ./svc.sh install
sudo ./svc.sh start
If every thing is good to go, you should see your build agent is online here

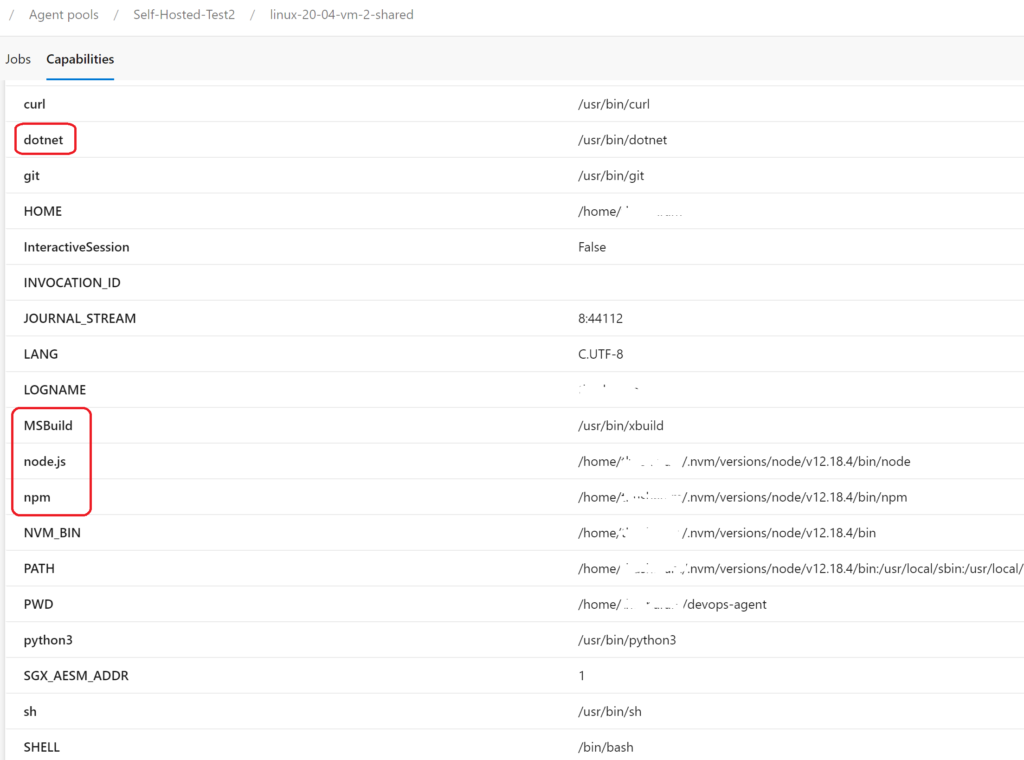
One of the important thing that you should look into is Agent capabilities. When Azure DevOps pipeline tasks are running, it first looks into capabilities of build agent. If required capabilities are not presented in build agent, it may throw some errors. Therefore you must look into agent capabilities on this window and make sure all the capabilities are there to do your job.
Now you will be able to select this Agent Pool at your Azure DevOps build
and release pipelines. Now you have freedom of running your pipelines any number of minutes. If you face any changes during setting up your Linux box and CI/CD agent, please post your questions here at comment section.